How do I change my Windows mouse cursor?
 This page contains steps on how to change the appearance of one or more of the various mouse cursors in Microsoft Windows. It should be noted that some programs use their own mouse cursors and changing the Windows cursors does not always affect those used in third-party software. To proceed, choose one of the links below and follow the instructions.
Change single mouse cursor
- Push the Windows Key, type Change the mouse pointer display or speed into the Windows search box, and press Enter. In Windows 8, typing anywhere on the Start Screen brings up the search box automatically.
- In the Mouse Properties window that appears, click the Pointers tab.
- On the Pointers tab (shown below), select the mouse cursor you want to change in the Customize section. For instance, the cursor you see normally (Normal Select) or the cursor you see while your computer is working or loading a program (Busy).
- After you've made your selection, click Browse.

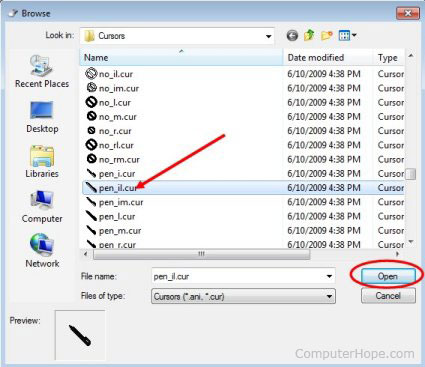
- Clicking the Browse button brings up a list of every cursor installed on your hard drive. Select a cursor from the list and then click Open.

- After selecting a replacement mouse cursor, you should see it change in the Mouse Properties window. In the image below, you can see that we've changed the Normal Select cursor.

- Click Apply and then OK to save the changes.
Changing multiple mouse cursors
- Push the Windows Key, type Change the mouse pointer display or speed into the Windows search box, and press Enter.
- In Windows 8, typing anywhere on the Start Screen brings up the search box automatically.
- In the Mouse Properties window that appears, click the Pointers tab.
- On the Pointers tab (shown below), click the down arrow on the box under Scheme and select another cursor scheme.

- Once a new scheme has been chosen, you can preview how it affects each of the various mouse pointers by scrolling through the Customize window.
- Once you are satisfied with your new selection, click Apply and then OK.


.png)